In this guide, we’re going to show you how to receive custom notifications and set up a visual KPI counter for Calendly using PingBell. Let’s get started!
What is PingBell?
PingBell is a web and mobile application that allows you to create and receive custom notifications each time a specific event is logged on a website or app. This includes Calendly!
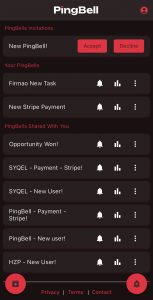
Step 1: Creating a PingBell
- Create Your Account
- Visit PingBell.io and create your free account.
- Once logged in, click the button in the middle of the page to create your first PingBell.
- Set Up Your PingBell
- Title and Description: Set the title and description of your PingBell. These details will show up whenever you receive a notification from the app and on the Celebration Page.
- Custom Notification Sound: Choose a custom notification sound for your phone. Preview the sounds by clicking on them to find the one you like.
- Invite Users: Add email addresses or PingBell usernames to invite others to receive notifications. If they don’t have a PingBell account, they’ll receive an email to sign up.
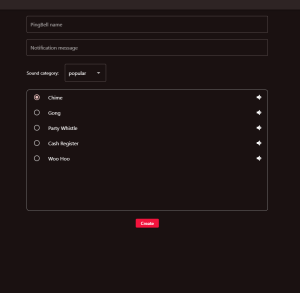
- Editing Your PingBell
- To create a new PingBell, click the bell icon at the bottom right of the screen.
- Edit existing PingBells by clicking the three dots beside the PingBell and then the pencil icon.
Step 2: Setting Up the Trigger for Calendly
- Use Zapier
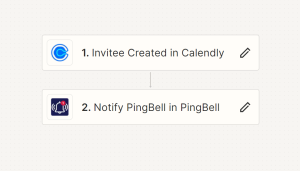
- Log in to your Zapier account and create a new Zap.
- Select Trigger App: Search for and select Calendly.
- Set Trigger Event: Choose an event like a new meeting scheduled. Connect your Calendly account and test the response to ensure it’s working.
- Set PingBell Action
- Select Action App: Search for PingBell and select “Notify PingBell” as the event.
- API Key: Retrieve your API key from PingBell by clicking the user icon at the top right, selecting settings, and copying the API key. Paste this key into Zapier.
- Choose PingBell: Select the PingBell you created to complete the trigger setup.
Step 3: Setting Up the Celebration Page
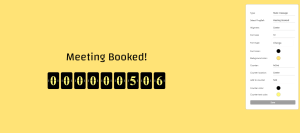
- Access Celebration Page
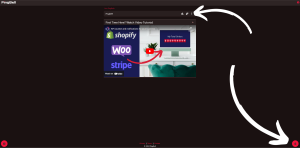
- On the PingBell homepage, click the celebration icon next to your PingBell to go to the Celebration Page.
- Hover to the right side of the screen to reveal the hidden menu for customizable settings.
- Enable Visual Counter
- Go to the counter option and set it to enabled.
- Customize Messages
- Static Message: Displays the title of your PingBell always.
- Disappearing Message: Shows for a few seconds when notified, providing a celebration effect.
- Disappearing Bubble: Similar to the disappearing message but with a more visually appealing effect.
- Customize Appearance
- Font Size and Type: Access all Google Fonts by typing into the field.
- Colors: Set background color, font color, counter color, and counter text color using the color wheel.
- Set Counter Baseline
- Determine the starting point of the counter to accurately reflect your business’s total actions.
Step 4: Viewing Analytics
- Analytics: Click the graph icon next to each PingBell to see how many times it has been notified.
- Time Frames: View data for the past 24 hours, 7 days, or 30 days to monitor specific KPIs.

Now you can utilize PingBell’s custom notifications and KPI counter with Calendly. PingBell makes it possible to receive notifications for any KPI from thousands of websites and applications. Sign up for your free account at PingBell.io to get started. Thanks for following along, and be sure to check out our other tutorials!


